


 E
E
 E
E


Mastering Your G-Shock: A Comprehensive Guide on How to Set the Time on a Casio G-Shock
Introduction: Why Knowing How to Set the Time on a Casio G-Shock is Essential Your Casio G-Shock is more than just a watch. It's a statement of durability and...
Introduction: Why Knowing How to Set the Time on a Casio G-Shock is Essential
Your Casio G-Shock is more than just a watch. It's a statement of durability and precision. However, even the toughest watches need occasional adjustments. Perhaps you've traveled across time zones, observed Daylight Saving Time changes, or simply replaced the battery. Knowing how to set the time on a Casio G-Shock is a fundamental skill for any owner. This comprehensive guide will walk you through every step, ensuring your G-Shock always displays the correct time, no matter the model or situation. We will cover various G-Shock types, from classic digital to advanced Bluetooth-enabled models.
Keeping accurate time is crucial for daily life. A G-Shock's robust design means it will last for years. Therefore, understanding its core functions, like time adjustment, is incredibly valuable. Let's dive in and master how to set the time on a Casio G-Shock.
Understanding Your G-Shock: The Buttons and Module Number
Before you begin setting the time, it helps to know your watch's layout. Most G-Shock watches have four primary buttons. These buttons are usually labeled or have distinct functions. You will use them repeatedly to navigate the settings menu.
- ADJUST (or A): Often located at the top-left. This button usually initiates and finalizes settings.
- MODE (or C): Typically at the bottom-left. It cycles through different modes like stopwatch, alarm, and time setting.
- SEARCH/REVERSE (or B): Top-right button. Used to decrease values or move backward through options.
- FORWARD (or D): Bottom-right button. Used to increase values or move forward through options.
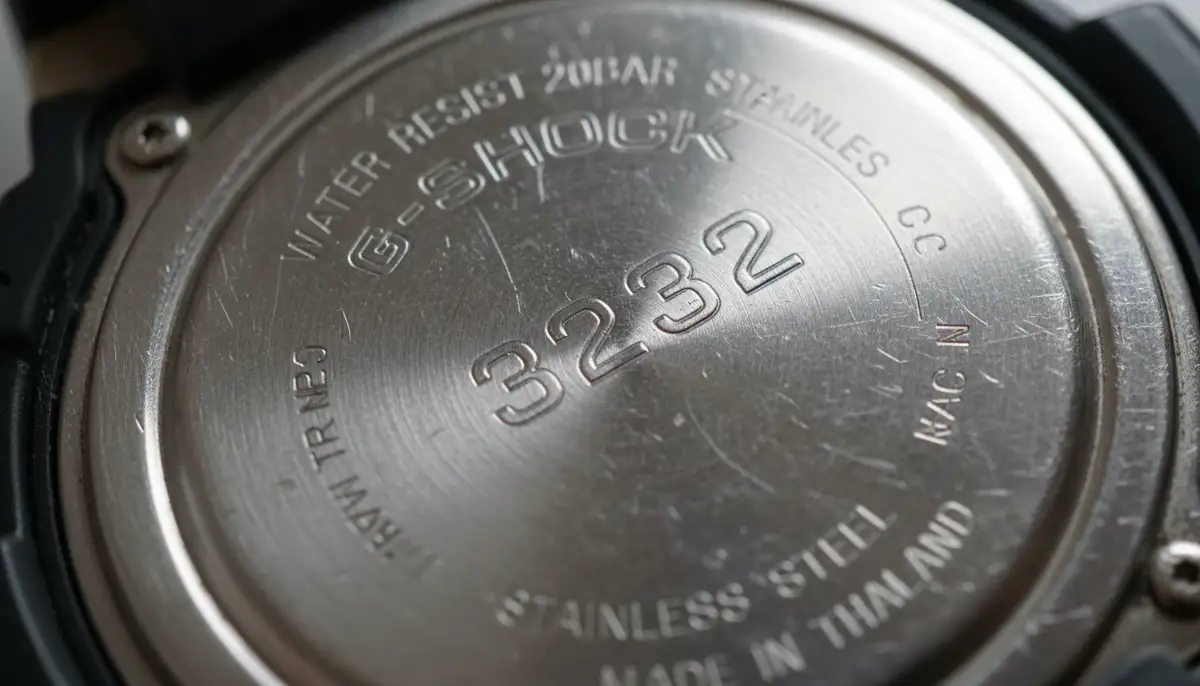
Another critical piece of information is your watch's module number. This is a four-digit number found on the back of your G-Shock. It's essential because G-Shocks come in many models. Each model might have slight variations in its setting procedure. You can find detailed instructions for your specific model by checking the official Casio manuals page using this number. This ensures you have the most accurate guidance for your particular watch.
Step-by-Step Guide: How to Set the Time on a Casio G-Shock (Manual Method)
This general method applies to many digital-only G-Shock models. While specific steps might vary slightly, the core process remains the same. This is the most common way to learn how to set the time on a Casio G-Shock.
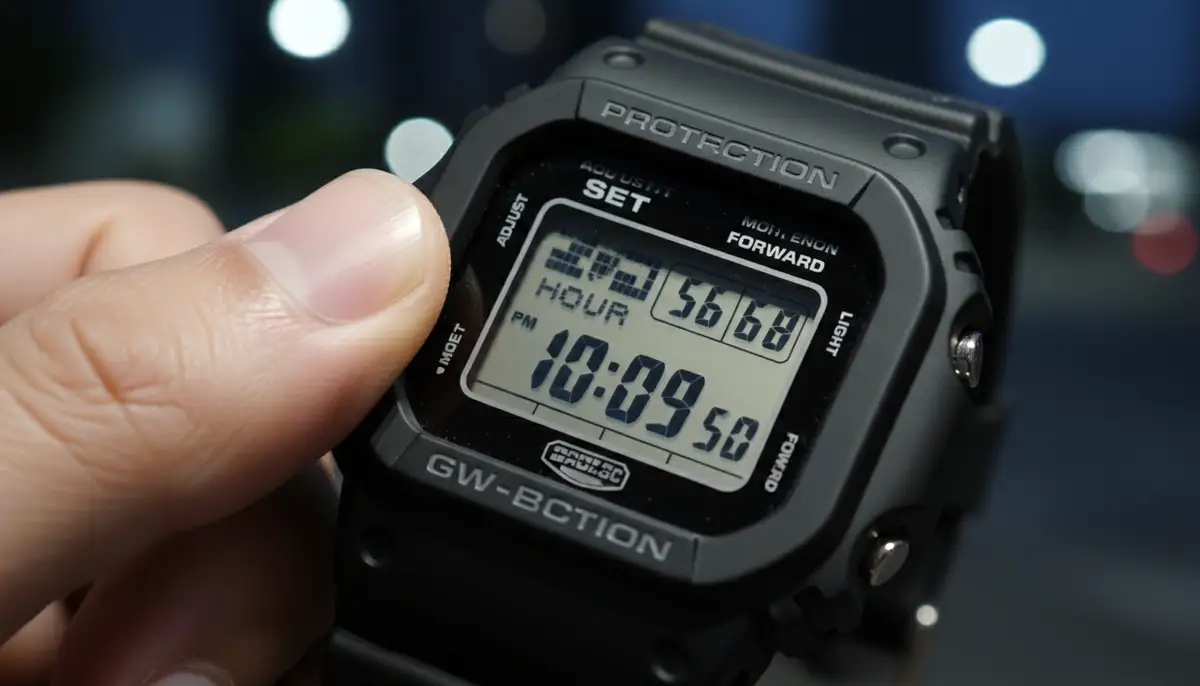
Phase 1: Entering Time Setting Mode
- 1. Locate the ADJUST button: This is usually the top-left button on your G-Shock.
- 2. Press and Hold ADJUST: Press and hold this button for about 2-3 seconds. You will hear a beep, and the watch's display will start flashing. This flashing indicates you are in the time setting mode. The 'Home City' code usually flashes first.
Phase 2: Selecting Your Home City and DST Settings
The first setting you'll encounter is often the Home City. This is crucial for accurate timekeeping, especially for watches with World Time features. Use the 'SEARCH' and 'FORWARD' buttons to select your city code. Once your Home City is set, press the 'MODE' button. This will move you to the Daylight Saving Time (DST) setting. Use 'SEARCH' or 'FORWARD' to toggle DST 'ON' or 'OFF' as needed. Most regions observe DST, so check your local regulations. For more basic details on adjusting the time on your G-SHOCK watch, you can refer to additional resources.
Phase 3: Adjusting Time and Date Parameters
After setting DST, press the 'MODE' button again. You will now cycle through various time and date settings. Each press of the 'MODE' button moves you to the next parameter. Use the 'SEARCH' and 'FORWARD' buttons to change the flashing value.
- 1. 12/24-Hour Format: Choose between a 12-hour (with AM/PM indicator) or 24-hour display. Select your preference using the 'SEARCH' or 'FORWARD' buttons.
- 2. Seconds: You can reset the seconds to zero. This is useful for precise time synchronization. Press 'SEARCH' or 'FORWARD' to reset.
- 3. Hours: Adjust the hour. Be mindful of AM/PM if you are in 12-hour format.
- 4. Minutes: Set the minutes.
- 5. Year: Adjust the current year.
- 6. Month: Set the current month.
- 7. Day: Finally, set the current day.
Some models might also include settings for button tone, light duration, or other features. Just keep pressing 'MODE' to skip through them if they are not relevant to setting the time. The process of how to set the time on a Casio G-Shock is quite intuitive once you get the hang of it.
Phase 4: Exiting Settings
Once you have adjusted all the necessary settings, press the 'ADJUST' button again. This will save your changes and exit the setting mode. Your G-Shock will now display the correct time. Congratulations! You have successfully learned how to set the time on a Casio G-Shock manually.
Advanced Methods: How to Set the Time on a Casio G-Shock for Specific Models
G-Shock offers a wide range of models. Some watches come with advanced features that simplify time setting. Let's explore these methods. This will further enhance your understanding of how to set the time on a Casio G-Shock, regardless of its specific capabilities.
Analog-Digital G-Shocks: Syncing Hands with Digital Time
Many G-Shock models feature both digital and analog displays. After setting the digital time, you might notice the analog hands don't match. Don't worry, this is normal. You need to perform a 'hand home position adjustment.' Here’s how:
- 1. Enter Time Setting Mode: Hold down the 'ADJUST' button until the city code flashes.
- 2. Cycle to Hand Set Mode: Press the 'MODE' button repeatedly until 'H.SET' or 'HAND SET' appears on the digital display. The hour and minute hands will usually move to a specific position (e.g., 12:00).
Now, use the 'SEARCH' and 'FORWARD' buttons to align the analog hands. Make sure they point exactly to 12 o'clock. This is their 'home position.' Once aligned, press the 'ADJUST' button to save and exit. The analog hands will then automatically move to match the digital time you set. This ensures consistency across both displays. Knowing this is key for how to set the time on a Casio G-Shock with both digital and analog components.
Atomic Timekeeping (Multi-Band 6): Automatic Synchronization
Some high-end G-Shocks feature Multi-Band 6 technology. These watches automatically receive time calibration signals from atomic clocks in six different regions worldwide. This ensures incredibly accurate timekeeping. If you own one of these, you rarely need to manually adjust the time. Your watch will handle it for you, often overnight. However, you might want to force a manual receive or check the last reception.
- 1. Manual Receive: In Timekeeping Mode, hold the 'FORWARD' button for a few seconds. 'RC!' will appear, indicating it's attempting to receive the signal.
- 2. Check Last Reception: In Timekeeping Mode, press the 'FORWARD' button once to see the last successful reception time and date.

Ensure your watch is in a location where it can receive the signal. Avoid being near electronic interference. If your Multi-Band 6 G-Shock isn't syncing, check its home city setting. Make sure it corresponds to one of the six signal reception areas. This feature makes learning how to set the time on a Casio G-Shock almost effortless for these models.
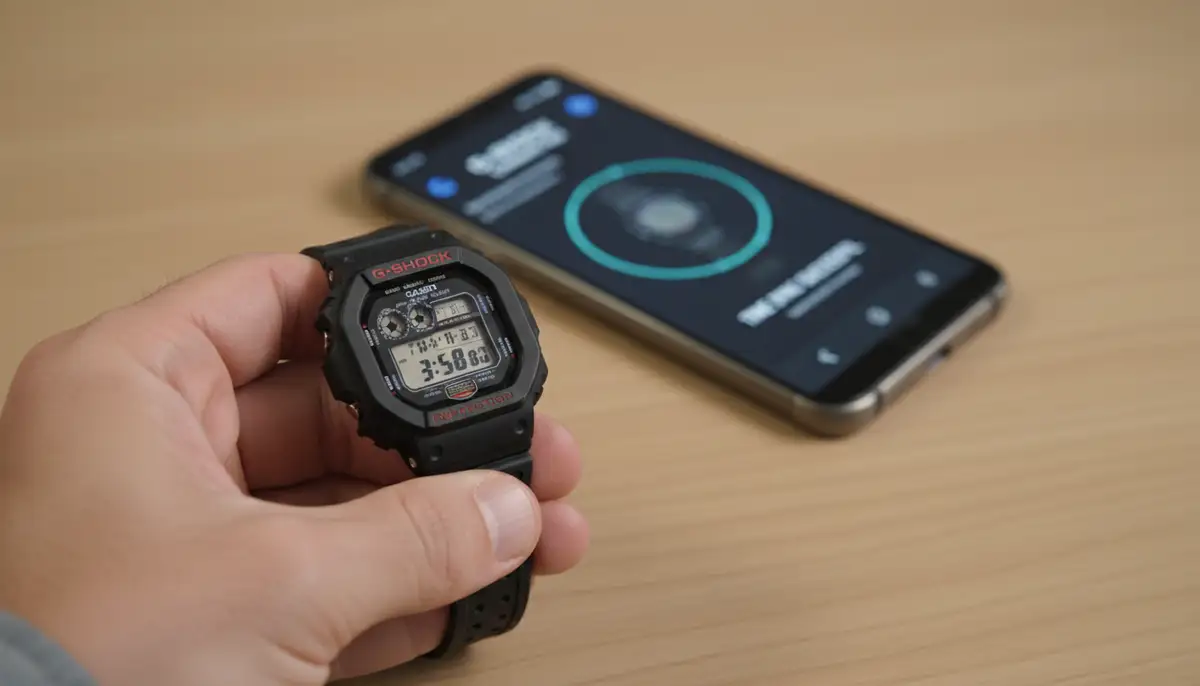
Bluetooth/Smartphone Link Models: The Easiest Way to Set Time
Modern G-Shocks often come with Bluetooth connectivity. This allows them to link with your smartphone via the G-Shock Connected app. This method is by far the easiest way to set the time. Your watch will automatically synchronize with your phone's time. This happens whenever you connect. Here's how to use this feature:
- 1. Download the App: Get the 'G-Shock Connected' app from your smartphone's app store.
- 2. Pair Your Watch: Open the app and follow the on-screen instructions to pair your G-Shock. This usually involves holding a button on your watch (often the 'ADJUST' button) until 'CONNECT' flashes.
- 3. Automatic Sync: Once paired, your watch will automatically adjust its time to your phone's current time. It will also update for DST changes and time zone shifts.
This method simplifies how to set the time on a Casio G-Shock immensely. You just need to ensure Bluetooth is active on both devices. Many watch enthusiasts also appreciate the customization options available through companion apps. For example, platforms like Pujie Black, amoledwatchfaces.com, and facer.io offer extensive watch face customization for smartwatches. Similarly, the G-Shock app provides great control over your watch's settings. If you’re interested in other smartwatch comparisons, you might find our guide on choosing between smartwatches insightful.
Troubleshooting Common Time Setting Issues
Even with the best instructions, you might encounter a snag. Here are common issues and how to resolve them when you're trying to set the time on a Casio G-Shock.
| Issue | Possible Cause | Solution |
|---|---|---|
| Analog hands don't match digital time | Hands are out of alignment (home position incorrect) | Perform 'Hand Home Position Adjustment' (refer to Analog-Digital section) |
| Time is still incorrect after setting | Incorrect Home City or DST setting | Re-enter setting mode and verify Home City and DST. Ensure you save changes. |
| Atomic sync (Multi-Band 6) fails | Poor signal reception, incorrect Home City, or watch not in optimal position | Move to an open area, away from electronics. Ensure Home City is correct. Try manual receive overnight. |
| Watch not connecting via Bluetooth | Bluetooth off on phone/watch, app not open, or pairing issue | Check Bluetooth on both devices. Ensure G-Shock Connected app is open. Re-attempt pairing. |
| Settings revert after exiting | Did not press 'ADJUST' to save changes | Always press 'ADJUST' to exit setting mode and save all modifications. |
Sometimes, a simple reset can fix stubborn issues. Refer to your watch's manual for instructions on a full reset. Remember, the more you practice how to set the time on a Casio G-Shock, the easier it becomes.
Beyond Time Setting: Other Useful G-Shock Features
While knowing how to set the time on a Casio G-Shock is crucial, these watches offer much more. G-Shocks are packed with features designed for adventurers and everyday users alike. Exploring these can enhance your watch experience.
World Time Function
Many G-Shocks include a World Time mode. This allows you to quickly view the current time in different cities around the globe. To access it, press the 'MODE' button until 'WT' or 'WORLD TIME' appears. Use the 'SEARCH' and 'FORWARD' buttons to scroll through various city codes. This is incredibly useful for travelers or those with international connections. It's a testament to the versatility beyond just how to set the time on a Casio G-Shock.
Stopwatch and Timer
G-Shocks are renowned for their robust timing functions. The stopwatch mode measures elapsed time, split times, and 1st-2nd place times. The countdown timer is perfect for specific tasks, from cooking to workouts. Navigate to these modes using the 'MODE' button. Then use 'SEARCH' and 'FORWARD' to operate them. These features highlight the practical utility of a G-Shock.
Alarms
Set daily alarms to keep you on schedule. Many G-Shocks offer multiple alarms, a snooze alarm, and an hourly time signal. Access the alarm mode via the 'MODE' button. Use the other buttons to set the desired alarm time. This is a simple but effective way your G-Shock helps manage your day. You can find more general tips on changing the time on your G-Shock watch from community discussions as well.
Maintaining Your G-Shock for Long-Term Accuracy
Setting the time is just one aspect of G-Shock ownership. Proper maintenance ensures your watch remains reliable for years. G-Shocks are built tough, but a little care goes a long way. This includes regular checks and understanding its power source.
Battery Life and Replacement
Most G-Shocks use a standard lithium battery that lasts several years. Solar-powered models (Tough Solar) recharge using light. If your digital display starts to fade or the watch behaves erratically, it might be time for a battery change. For Tough Solar models, ensure they get enough light exposure. A dying battery can sometimes affect timekeeping accuracy. This is another reason why knowing how to set the time on a Casio G-Shock is important after a battery change.
Regular Checks and Cleaning
Periodically check your watch's time against a reliable source. This could be your smartphone or an atomic clock. A quick glance confirms accuracy. Keep your G-Shock clean, especially around the buttons and case back. Use a soft cloth and mild soap if needed. This prevents debris from affecting button functionality. For those who appreciate the robust yet stylish nature of G-Shocks, you might also be interested in exploring the debate between digital and analog watches and their unique appeals.
The Importance of Precision in a Connected World
In 2025, accurate time is more critical than ever. Our lives are filled with scheduled meetings, travel plans, and digital interactions. Your G-Shock, whether set manually or automatically, plays a vital role. It provides a reliable time reference right on your wrist. This frees you from constantly checking your phone. It's about having dependable information at a glance. Knowing how to set the time on a Casio G-Shock gives you full control over this essential tool.
Whether you prefer the classic manual method or the convenience of smartphone linking, your G-Shock is ready. It's a watch built for life's challenges. And now, you have the knowledge to keep it perfectly in sync. For those who enjoy customizing their watch experience, consider exploring the vast array of weather watch faces available. Our platform, WatchMaker, offers thousands of unique designs for Apple Watch and WearOS devices, allowing you to personalize your wristwear beyond just timekeeping.
Watch this helpful video for a visual guide on the process:
Conclusion: You've Mastered How to Set the Time on a Casio G-Shock!
By now, you should feel confident about how to set the time on a Casio G-Shock. We've covered everything from basic button functions to advanced synchronization methods. Your G-Shock is a reliable companion. Keeping it accurate ensures you're always on schedule. Remember these steps, and you'll always have the correct time. Enjoy the precision and durability your G-Shock offers. It's a watch designed to keep up with you, no matter where life takes you.